
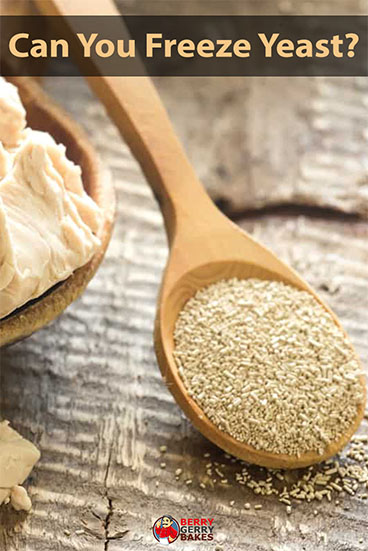
Question: Can you freeze yeast? Read on to find out.
Fresh yeast is a perishable product that cannot last a long time. If you don’t plan to use it on a daily basis then what you buy will probably go to waste. Can fresh yeast be stored in the freezer? If you regularly bake at home and you prefer using fresh yeast (also known as baker’s yeast) than popularly used dry yeast, then you probably know how to handle it.
After buying a pack of fresh yeast, using it to bake some bread and cookies, you’ll have to keep what is left in the refrigerator. If you’re lucky, you’ll be able to use some small quantity within a few days to bake some more goodies. The remaining chunk that you keep in the fridge will turn brown and probably get spoiled in a week or more.
Isn’t this incredibly wasteful? This is why we decided to test whether or not the remaining chunk of fresh yeast can be frozen. If it works, you’ll no longer have to gather several recipes for fresh yeast so that you can use the entire block or throw away whatever is remaining. I bet you’re always left with more than a half a block.
Can Fresh Yeast Be Stored In The Freezer?
From all the research we conducted, we discovered that a number of people said that it was okay to freeze fresh yeast and there were others who said that it was impossible to do so while others said that the outcome wasn’t consistent. This wasn’t very helpful.
This is why we decided to conduct the test for ourselves. If the results we get aren’t consistent, it means that the baked products won’t always rise as they’re required to and there’s no need to freeze the fungus.
We basically want to ensure that when all the ingredients are gathered, the entire process will not fail while we’re still in progress because the yeast isn’t performing its task. The test we conducted is described in the “Freezing Fresh Yeast Experiment” category which you’ll find if you continue reading the article. Continue reading for more information and some photos of what was baked.
Without saying much, we found that the process of freezing fresh yeast works pretty well and would be a great option for when you’d like to store yours for a long time.
How Can You Freeze Fresh Yeast?
For more consistent results, make sure that your yeast is defrosted in the same way. There was more success when we used the following methods:
a) Defrosting a small chunk for at least 12 hours in the fridge
This was enough time for it to defrost fully. If you have bigger blocks than what we used (ones that measure around 20 grams), you may require more time. When it comes to smaller blocks of fresh yeast, they’ll need lesser time to defrost. Move the chunk you plan on using into the fridge the previous night before using it.
b) (Optional) Warm up the piece of fresh yeast at normal temperature for at least 30 minutes
For the yeast to get to normal temperature, give it 30 minutes more before you can use it. you can opt out of this step when you have to start baking immediately.
c) Use
Your yeast is now ready for use according to what your recipe requires.
If you didn’t thaw the chunk you need the day before and it’s needed right away, you can attempt crumbling it on a plate before letting it stay for at least 30 minutes at room temperature. most people advocated for this method, though we didn’t test it. So, do it if you don’t mind taking risks.

How Frozen and Thawed Fresh Yeast Can Be Used
If you’re using fresh yeast for the first time and it wasn’t frozen and thawed beforehand, it’s normal to be worried about it won’t work as well as before. That all your ingredients will just get wasted and the entire baking process will be a disaster.
Luckily, there’s a procedure that enables you to test for yeast effectiveness before using the needed amount. The process is known as proofing and you can learn more about it here on the storage and shelf life of yeast. All that is required is yeast, sugar, warm milk or water and around ten minutes to confirm whether or not it’s still active.
If you’re not completely sure that the defrosted yeast is still active, proof it. It will enable you to know whether it will perform its job of being a leavening agent. In short, you’re confirming whether the dough you just mixed will change from this:
To this:

Experimenting on Freezing Fresh Yeast
The following is a complete log on how we conducted the experiment on the effectiveness of frozen yeast.
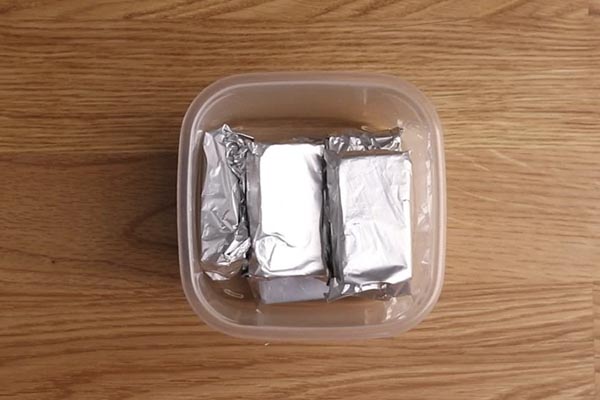
Day 1
This was the day we began the experiment by freezing our fresh yeast. Most photos that are used in this article were taken on that day. You’ll be able to see how the blocks were frozen in the video are included here.
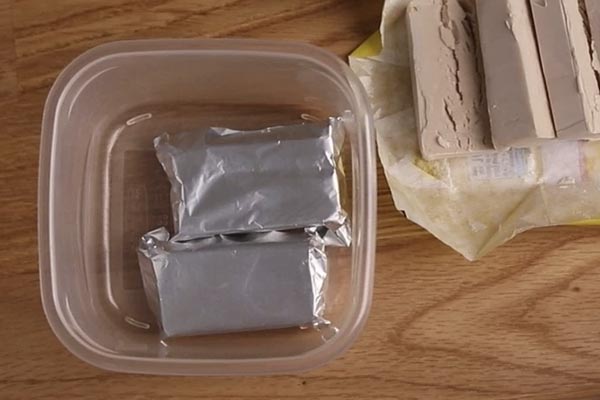
Day 4
This is the first day we used some of the frozen yeast after thawing it. The blocks were frozen for only 4 days as we needed to quickly test whether the procedure works.
Yesterday night, we transferred a block of frozen yeast to defrost so that it would be ready to bake a couple of bread rolls (also referred to as hamburger buns, we also put some in the freezer) in the morning.
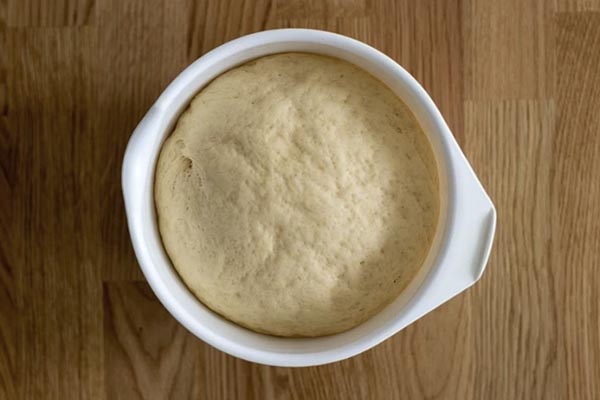
The yeast we defrosted worked just fine. Sees for yourself:

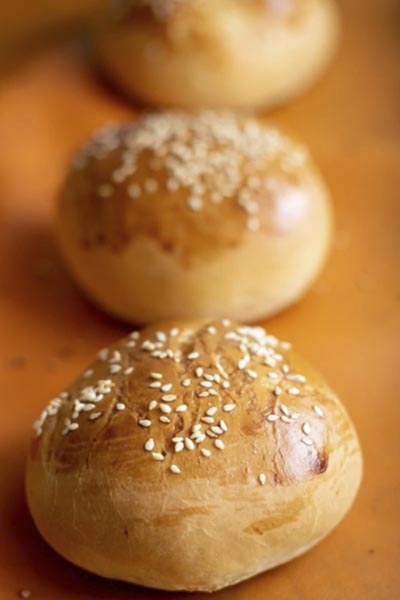
As you will see in the photo below, instead of 6 small buns, we opted to bake 4 bigger buns. This is how they turned out:

Day 8
Another chunk of yeast that we froze was used to bake another batch of four buns. We even included an article about frozen hamburger buns, for people who won’t be able to eat everything they baked in one sitting.
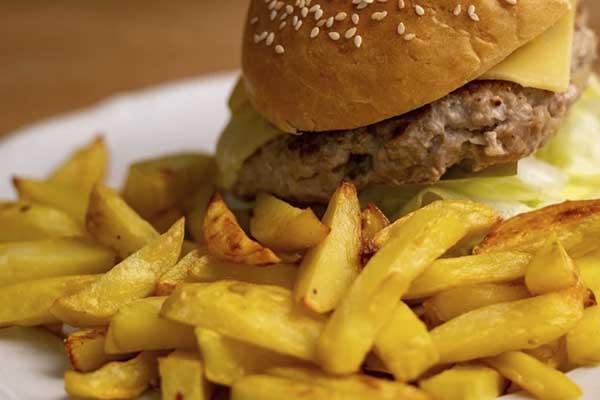
This time as well, we put the cube of frozen yeast in the fridge on the previous evening, and proceeded to work on the hamburger buns the following morning. The yeast functioned just as well this time too. Here are the results of how the dough turned out:
And this is one of the hamburgers we prepared:

So far, the frozen yeast performs as expected.
Day 23
Today, we used another chunk of frozen baker’s yeast to bake 5 slightly larger buns. The procedure was similar the one we conducted before except we added a little amount of yeast that was in the fridge to compensate for the flour that was added. Once more, everything turned out perfectly well.

And these are some of the burger buns we baked:

Day 62
This batch too gave successful results. Everything was conducted like before, so we won’t get into details on what we did. Here is a picture of the dough:
Day 87
The baker’s yeast has now been frozen for 3 months and it still works perfectly. The process was performed the same way as it did earlier and it gave the same results.
As you’ll see below, the dough didn’t rise as like it did the last time round, but it all had to do with the temperature. The kitchen was a little colder that it normally is, which limited the ability for it to grow.
After the buns were formed, we left them next to the stove for at least thirty minutes so that they could grow further and it worked out perfectly.

Day 159
This was our final batch and just like the other ones, it worked perfectly.
At the beginning, the dough didn’t rise like we anticipated it to. But we discovered that it just required more time since the temperature in the kitchen wasn’t as high as it was when we worked on the other doughs. After sitting in a warm area for an additional 20 minutes, it started rising as normal.
Here are the results:
